How to add widgets on iPad
How to add widgets on iPad - you have found on the Home screen an option to add the famous widgets , one of the most anticipated new features of this update. With iPadOS 14 and, subsequently, with iPadOS 15
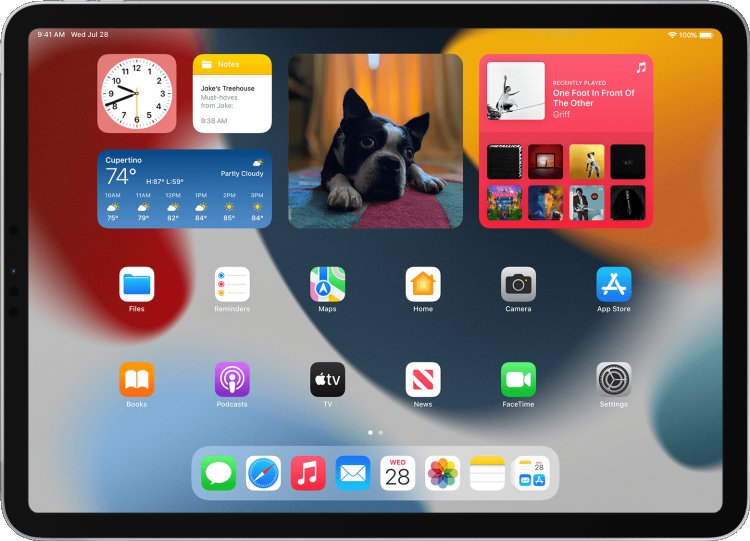
Ever since you updated your iPad to iPadOS 13, you have found on the Home screen an option to add the famous widgets , one of the most anticipated new features of this update. With iPadOS 14 and, subsequently, with iPadOS 15, widgets have been integrated even better within the Home - to the point of being able to be freely added anywhere on it - and at this point I would say that there is no reason not to start to use them.
As you already know, in fact, widgets allow you to obtain essential information such as weather forecasts, latest news, charge status of your devices, etc. at a glance, without having to open an app or site to consult them. Think for example of the News widget: it's practically a small press review at your fingertips!
Sounds very interesting, doesn't it? You just don't know how to add widgets on iPad and you really need someone to explain it to you. Well let me tell you: you've come to just the right place! In this tutorial, in fact, I will teach you not only to add widgets on iPad, but I will also give you some useful tips to better customize your Home screen by adding widgets that are a little more editable than those you find already installed. Ready to get started? So enjoy your reading and, above all, have fun!
Preliminary information
A little above I was talking about a better integration of widgets between the first versions of iPadOS and iPadOS 15 : with the release of the update in question , in fact, some important innovations were introduced regarding the management and aesthetics of the Home screen, which can now be customized by arranging widgets along with apps.
Once, on iPadOS 13 and 14, widgets were relegated to a single space to the left of applications and these could not in any way "mix" with apps. Now, however, it is possible to take advantage of the entire space of the Home to arrange the desired widgets . Not only that: users of previous versions will remember that the widgets were visible only with the iPad screen rotated horizontally, while today the widgets remain in place even when the screen is oriented vertically . Convenient, isn't it?
The other changes are more marginal than those described and many of them affect individual widgets such as Smart Collections , which have been redesigned. From today, for example, the Collections will integrate widget suggestions based on your recent activity ; so, if you have made a booking via the app, the app widget will temporarily appear as the first in the collection for the duration of the booking. This is also a nice plus, isn't it?
How to insert widgets on iPad
As just mentioned, with iPadOS 15 it is possible to insert widgets on any page and point of the Home screen . To do this, touch and hold an empty area of the Home, then touch the Add (+) button located at the top left and select a widget from the list that is proposed to you. Next, slide your finger on the selected widget, from right to left, to choose a size (small, medium or large) and finally press the Add widget button .
At this point you will find yourself on the Home screen. Do you see that the apps and the added widget are "shaking"? This means that you can choose the position of various elements on the screen, including your widget of course. Then press on it and drag it to the desired position. Then, tap the Done button located at the top right. That's it - you just added your first widget.
You can also decide to insert widgets only in Today view , that is, in that section of the iPad specifically designed to host widgets that can be accessed either from the lock screen or from the first page of the Home screen. This way, widgets won't mix with apps and will only remain visible when you swipe right across the screen.
So swipe as I indicated earlier to open the Today view, touch and hold an empty area of this view, or press directly on the Edit button . Once this is done, press the Add (+) button again and proceed as I told you before, that is by selecting a widget from the list on the left, choosing its size and finally tapping the Add widget button . You can always drag it up or down with respect to other widgets that may be present; when you are done, as usual, press the Finish button .
You can also drag a widget from the Home screen to Today view (but not vice versa). The categories of widgets available are very different: the list varies according to the apps installed (some of the ones you have on your device may have their own widget built in), but the most common are Batteries (shows the charge status of your Bluetooth devices , such as AirPods), Calendar , Photos , Weather , News , Notes , Clock , and Reminders .
Noteworthy are the Smart Collections , which rotate some widgets based on the time of day. You can edit the collections after having already entered them on the Home screen or in the Today view: long press on them and scroll through the various widgets to delete the unwanted ones (just tap the (-) sign in the upper left corner and confirm the operation pressing the Remove item ). To insert others, however, you can proceed as you usually would, only - instead of dragging them to an empty spot in the Home or Today view - you will have to position them exactly above the Gallery.
For Smart Collections, there are two additional customization options: Smart Rotation and Widget Suggestions . The first, if enabled, causes the chosen widgets to rotate automatically according to your needs (in the morning, for example, the Weather of the day could be displayed; in the evening, the Maps to go home), while the Widget Suggestions are functional because they show the widget of the last app you used and that you may need again in the short term.
To enable / disable them, long press on the widget you entered previously and then tap the Edit widget item . You will then have access to the available customization options and this applies not only to Smart Collections, but to all those widgets that give the user the ability to make changes.
How to insert widgets of other apps
In the previous chapter we focused mainly on integrated or “pre-installed” widgets; at this point, however, it should be known that many third-party apps also provide widgets. The updated widgets for iPadOS 15 and later work like the ones we saw above; to insert the others, on the other hand, you need to open the Today view , press the Edit button and then touch the Customize item .
You will have access to a new list, different from that of the "traditional" widgets, which contains all the widgets not yet updated. To add them, just hit the (+) button next to each one and then hit the Done button . The chosen widgets will flow into a separate section of the Today view, at the bottom of the other widgets that may be present. Note: it is not possible to insert this type of widget on the Home screen, but only, as we have seen, in the Today view.
Before I talked about "customization" about widgets: well, you must know that there are also apps with real packages of highly customizable widgets as regards colors, fonts and the graphic layout in general. One of them is Widgetsmith , a collection of categorized widgets that you can try if you are looking for a widget that is both functional and beautiful to look at. You will already know it, if you have read my tutorial on how to create a custom widget for iPhone .
If, on the other hand, you need some more ideas, I refer you to another guide in which I have reviewed the best widgets for iOS : why don't you go and take a look?
How to add News widgets on iPad
Now I propose to see together how to actually insert one of the widgets already present on iPad. I'm talking about the News widget , with the news of the day and featured articles from the main newspapers where you are. To insert the News widget, long-press an empty spot on the Home screen or Today view (depending on where you intend to place it) and then tap the Add (+) button .
So scroll down the list on the left of the screen to the widgets starting with the letter “n”: have you already found News? Well, select it and choose the size by sliding your finger over the preview. Small News shows a single headline, the website of the source, and in the background the image of the article. Medium news is more extended horizontally, but the title shown is always and only one. Big News , on the other hand, shows three headlines with their respective sources above and images of the articles next to them (where available).
After choosing the size, press the Add Widget button at the bottom . Done! Now drag it to the desired location and press the Done button in the top right corner of the screen.
In the App Store you can find several alternatives to the News widget, if your need is to have a more complete and extensive press review. Here are my tips.
- Flipboard - the popular news app also includes a widget with the best stories from the sections and people you follow. If you've never heard of it, I suggest you read the chapter I dedicated to it in this guide . Four sizes and interfaces available for this widget, from the largest, with four titles and as many thumbnails, to the smallest, a square widget with a single title and the photo of the post in the background. The advantage over News is that here the press review is customizable according to your favorite sources and topics, but to take advantage of this function - of course - you will first have to open the app and start using it.
- Google News - Again, the headlines shown vary based on your interests. The more you use the app, the more appropriate the suggestions will be. You can choose Topics and Sources from the Follow section of the application, otherwise Google News will learn by itself what interests you and will gradually show more and more titles in line with the topics of the articles you have already consulted.