How to divide the screen into two parts
How to divide the screen into two parts - ou have a really great monitor! Big, not to mention huge. Why not exploit it to its last pixel? Using the integrated functions on Windows and macOS to the fullest, in fact, it is possible to place several windows side by side and work simultaneously
You have a really great monitor! Big, not to mention huge. Why not exploit it to its last pixel? Using the integrated functions on Windows and macOS to the fullest, in fact, it is possible to place several windows side by side and work simultaneously with multiple programs, thus increasing one's productivity. How do you say? Have you already thought about it but don't have the faintest idea how to divide the screen into two parts ? So let me help you figure out how to proceed!
If you give me a few minutes of your free time, I can explain how to proceed not only on your PC, but also on your mobile devices (where possible). I guarantee that dividing (virtually) the screen of your computer or other devices at your disposal will really be child's play: you will only have to make the most of the functions offered by the operating system in use.
So, what are you doing still standing there? Get to work immediately: concentrate on reading the next paragraphs, implement the "tips" that I will give you and you will see that dividing the screen of your devices (even some mobile ones) into several parts will be as easy as drinking a glass of water. I wish you good reading and, above all, have fun!
How to split the screen into two parts on Windows 10
Do you have a PC equipped with Windows 10 or Windows 11 ? Then you will be happy to know that you can split the screen into two parts using a "stock" function.
If you want to make sure that the function in question is actually active on your PC, go to Windows Settings (by clicking on the gear icon in the Start menu ), press the System button, the Multitasking item (from the sidebar on the left) and make sure that next to the items Automatically arrange windows by dragging them to the sides or corners of the screen , When I dock a window, it will automatically adapt it according to the available space , When I dock a window it shows what I can tile andWhen I resize a docked window, it simultaneously resizes any adjacent docked windows that have the word Enabled . If not, activate the settings in question manually by moving the relative switches to ON .
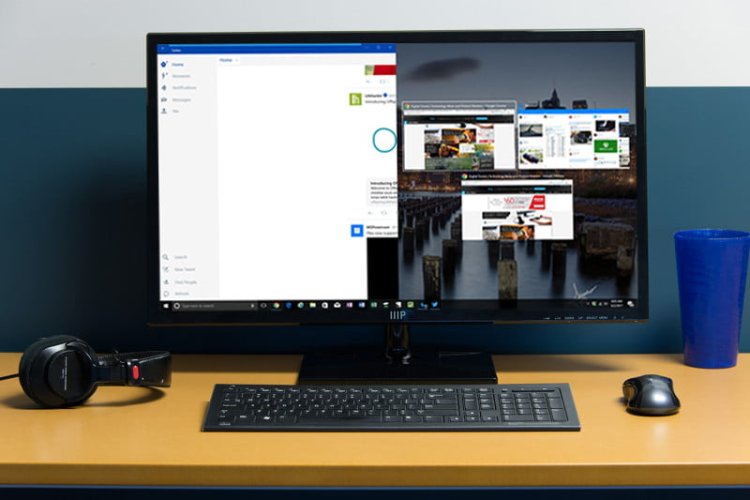
Now you can finally split the screen in two: click on the upper part of the program window that you want to insert in one of the two halves; while holding down the left mouse button, move the window to the right or left side of the screen and release it. In the "empty" part of the display, you will see any open windows: click on the one you want to place next to the one you have already placed on one of the two halves of the screen and you're done.
If you want, you can also change the aspect ratio of the windows using the divider that appears between one window and the other when you hover: on Windows 11 it is a little less visible than the one visible on Windows 10, but you can easily recognize it because the pointer, when stationed on it, turns into the ↔︎ symbol (as on Windows 10). As you can see, changing the size of one window will automatically change the size of the other, adapting it according to the available space.
If a version of Windows older than 10 is installed on your PC, however, unfortunately you cannot take advantage of the feature relating to the automatic adaptation of the size of the side-by-side windows. However, you can place two windows side by side exactly as I showed you in the previous paragraph (ie by taking a window, placing it on one of the sides of the screen and repeating the same operation for the window of another program).
The only "drawback" is that you will have to manually change the size of the respective windows (if necessary) because, as I have already told you, this does not happen automatically in the most obsolete versions of Windows.
How to split the screen into two parts on macOS
Are you using a Mac equipped with El Capitan or a later version of macOS ? In this case you can split the screen in two by placing two different applications side by side using the Split View feature .
Before explaining how to use it, make sure that the function is activated. To do this, go to the System Preferences menu (by clicking on the gray icon with gears on the Dock or in the Launchpad ), select the Mission Control item and make sure that the box The screens have separate spaces is checked , otherwise check it yourself.
To call up the function in question, first of all locate one of the two windows you want to insert in one of the two halves of the screen, make a long click on the green dot located in the upper left corner of the same and select the Split View item on the left side screen or Split View on the right side of the screen , according to your preferences.
Once you have tiled the window in question on the right or left side of the screen, click on one of the windows that you see in the "unoccupied" part of the same, so as to open it in Split View mode. If there are no other windows open, the message No window available will be displayed in the “empty” part of the screen .
If you have opened one of the two windows you want to view in Split View mode full screen, you can also place them side by side using the Mission Control mode , which allows you to have a general overview of all the windows open at a given moment, allowing you to place the open ones side by side full screen.
To bring up Mission Control, swipe up with 3 fingers on the trackpad or press the F3 key on your keyboard. After opening Mission Control, drag a window on the thumbnail of the application open in full screen (top) choosing the side in which to place it (in which there is the + symbol) and that's it.
After tiling the two windows side by side, you can resize them by enlarging and / or shrinking them using the black line that divides the screen in two. I remind you that some applications may not support Split View.
How to split the screen into two parts on Android
Would you like to split the screen on your Android device ? If your smartphone or tablet is updated to Android 7.0 Nougat , or a later version, you will be happy to learn that you can do this by taking advantage of the Split Screen feature that has been implemented by Google in the most recent versions of its mobile operating system.
To split the screen on an Android device, press the multi-tasking button (the square icon , which is usually located at the bottom right or bottom left, depending on the device configuration), locate a of the applications you want to open in Split Screen mode and presses the icon of the two rectangles placed on the card of the chosen app.
At this point, the app in question will open and take up a portion of the screen. In the "free" part, however, you will still see the Android multi-tasking, from which you can choose the second app to be placed next to the first: press on it, so as to open it, and that's it. If you want, you can "split" the screen using the divider in the center.
On some Android devices updated to Android 6.0 Marshmallow or even more obsolete versions of the “Big G” mobile operating system, ad hoc functions have been integrated by the various OEMs (eg Samsung) that allow you to divide the screen in two.
To verify that such a function is supported on your device, contact the manufacturer of your smartphone or tablet to ask for explanations in this regard or run a short search on Google using queries such as " [device name] split screen function " .
How to split the screen into two parts on iPadOS
Even on iPadOS it is possible to divide the screen in two using the Split View function (which I told you about in the chapter dedicated to macOS ), which is available for iPads equipped with iPadOS 9 and later versions.
The Split View function should not be confused with Slide Over : while the first allows you to divide the iPad screen in two, the second allows you to view a sort of reduced window of another open app, which "covers" the application open to full screen. I also remind you that Split View is a feature available only on the most “powerful” iPads from the hardware point of view (from the iPad Air 2 onwards).
Having made these necessary clarifications, let me show you how to best use the Split View function: first open one of the two applications that you want to occupy a part of the screen, swipe from the bottom up to recall the Dock , press on the icon of the app you want to place next to the one you have just opened, drag it to the right or left side of the screen (until you see the icons of the two “protagonists” apps) and release it.
As you can see, the open app will occupy the desired portion of the screen: to adjust its size, press the divider and move the black line to the left or right, depending on the viewing mode you prefer. To exit Split View mode, tap the (...) button located at the top and select full screen mode (the full rectangle symbol ) or select Slide Over mode (the smaller full rectangle icon on the right side of the largest rectangle ). Please note that some apps may not support the Split View function.
The Split View function is also available on Safari , which can be useful for placing two Web pages side by side within the “made in Cupertino” browser . To call up the function in question, open a web page on Safari (just type the address of the site in its address bar ), make a long tap on the related tab, drag it to the right or left (depending on how you prefer ) and release it . Then, tap on the address bar , type the URL of the web page to be placed next to the previous one and that's it. Convenient, right?
In conclusion, I would like to point out that, at the time of writing, it is not possible to divide the screen into two iPhone parts , as iOS does not offer this possibility.